5 Hidden Costs of Concrete Removal in Calgary Nobody Warns You About

Introduction

Concrete step removal Calgary projects can look simple at first, but the final bill can grow fast when small details are missed. A cracked front step, an old patio edge, or a sinking walkway may seem like a quick demolition job, yet weight, access, disposal rules, and cleanup can all change the price. That is why many homeowners start with one number in mind and end up surprised by extra charges. White Knight Contracting helps homeowners understand these costs before work begins, which can make the process much less stressful. In Calgary, concrete removal pricing is shaped by local landfill rules, weather, labour, equipment, and the condition of the concrete itself. So, before you swing a sledgehammer or book a bin, it helps to know what nobody usually warns you about.

Table of Contents

A Short History of Concrete Removal in Calgary

For decades, concrete was treated as a tough, low-maintenance material that could last through Calgary’s freeze-thaw cycles. Builders used it for steps, sidewalks, garage pads, driveways, patios, and retaining edges. Over time, though, older concrete began to crack because water seeped in, froze, expanded, and pushed the surface apart. This is common in Calgary because winter weather can move from mild chinook conditions to deep freeze very quickly. In the past, many homeowners simply patched concrete again and again. Today, more people choose full removal because repeated patching can cost more in the long run.

Another big change is how disposal is handled. Years ago, demolition waste was often treated as general construction debris. Now, disposal sites often sort materials by type and weight. Concrete with rebar, soil, wood, asphalt, or garbage mixed in can cost more to dump. This means hidden fees demolition crews deal with today are not just about labour. They also come from local rules, recycling options, truck weight, and whether the material is clean or mixed.

Concrete Step Removal Calgary: Why Costs Are Often Higher Than Expected

Concrete step removal Calgary work is different from removing a loose slab in the middle of a yard. Steps are often attached to the home, close to a foundation, sitting near utilities, or tied into a walkway. That makes the job more careful and more time-consuming. A contractor may need saw cutting, hand tools, small machines, or extra protection around siding, doors, railings, and landscaping. If the steps contain rebar, mesh, or thick footings, removal can take longer than expected. The biggest surprise is often that concrete is much heavier than it looks.

Concrete usually weighs about 2,300 to 2,400 kilograms per cubic metre. That means even a small set of steps can create a heavy load. If the truck or bin reaches its weight limit, hauling may need to be split into more than one trip. This is where Calgary concrete costs can rise quickly. The job is not only about breaking concrete apart. It is also about moving it safely, loading it, hauling it, dumping it, and leaving the site ready for the next step.

5 Hidden Costs Nobody Warns You About

1. Debris Hauling and Weight-Based Disposal

The first hidden cost is debris hauling. Concrete is dense, and disposal sites often charge based on weight and material type. If your concrete is mixed with soil, wood, brick, or other waste, it may be charged at a higher rate. This can make a simple removal job more expensive than planned. One hidden cost of concrete removal is disposal pricing, since Calgary landfill loads are charged by weight and mixed materials can be billed at the highest applicable rate, which can quickly increase the final removal bill. To avoid this, ask whether the quote includes hauling, dump fees, and sorting.

2. Rebar, Wire Mesh, and Reinforced Concrete

Many older steps and pads contain rebar or wire mesh. These materials help strengthen concrete, but they make removal harder. Crews may need cutting tools, extra labour, and more time to separate metal from concrete. If the metal is not separated, disposal may cost more depending on the facility. Reinforced concrete also breaks into awkward pieces, which can slow loading. A step that looks like one solid block may hide steel inside. This is one reason concrete removal pricing can vary so much from one home to another.

3. Access Problems and Equipment Limits

Access is another hidden cost. If a machine can drive right up to the work area, removal is usually faster. But if the concrete is in a tight side yard, behind a fence, near garden beds, or beside a neighbour’s property, crews may need to remove it by hand. Hand removal takes more time and effort. It can also require smaller bins, wheelbarrows, plywood ground protection, or extra workers. In real-world terms, removing a backyard slab through a narrow gate is like moving furniture through a tiny hallway. Every trip takes longer.

4. Site Grading and Surface Repair

After concrete is removed, the ground underneath may not be ready for new work. You may find soft soil, drainage issues, old gravel, roots, voids, or uneven grade. Site grading means shaping the ground so water drains away from the home. This matters because poor drainage can lead to future cracking, basement moisture, or ice buildup. If the quote only covers demolition, grading may be extra. Ask whether cleanup, base removal, backfilling, and final leveling are included. The cheapest removal quote is not always the lowest final cost.

5. Permits, Utility Checks, and Safety Requirements

Most small residential concrete removal jobs do not need a permit, but there are exceptions. Work near retaining walls, property lines, city sidewalks, utilities, or structural parts of the home can trigger extra requirements. Utility locates may also be needed before digging or breaking concrete near buried lines. This is especially important around gas, electrical, irrigation, and drainage systems. Safety planning can also add cost if the work area is close to public walkways or shared spaces. These hidden fees demolition projects face are often about preventing damage, not just following rules.

Calgary concrete costs have been affected by higher fuel prices, disposal charges, labour demand, and equipment costs. When fuel rises, hauling gets more expensive. When landfill or recycling rates change, disposal pricing also changes. In addition, many homeowners are choosing to remove old concrete before installing composite steps, pavers, improved drainage, or modern entryways. This means contractors may be busier during spring, summer, and early fall. Booking early can help you avoid rush pricing and long wait times.

Another trend is a greater focus on recycling clean concrete. Clean concrete can sometimes be crushed and reused as base material for roads, driveways, or construction projects. This can be better for the environment and may reduce landfill pressure. However, recycling only works well when the concrete is not mixed with garbage, soil, or other materials. This is why sorting matters. Homeowners who keep the job site clean may have more disposal options.

Common Challenges Homeowners Face

One common challenge is comparing quotes. One contractor may include hauling, disposal, basic cleanup, and labour, while another may only list demolition. At first, the cheaper quote looks better. Later, extra charges can appear for dump fees, overweight bins, or added labour. To compare fairly, ask every contractor for the same details. You should know what is included, what is not included, and what could change the price.

Another challenge is timing. Calgary weather can shift quickly, and frozen ground can make removal harder. Rain can create mud, slow hauling, and make site grading more difficult. Snow cover can hide cracks, edges, and buried hazards. For best results, plan concrete removal during dry weather when the site is easy to inspect. If you are replacing the concrete, also leave enough time for base prep and installation. Good planning can save money before the first piece of concrete is broken.

Company Highlight

White Knight Contracting has been in business since 2011 and brings practical experience to concrete removal, exterior repairs, and related home improvement work. One major strength is that they can handle many parts of a project, including siding, without forcing homeowners to hire a second contractor. That matters when concrete steps are close to exterior walls, trim, doors, or other finished surfaces. Instead of juggling multiple schedules, homeowners can work with one team that understands the full job. This can reduce delays, miscommunication, and surprise costs. Their broad service range is especially useful after hail, weather damage, or aging exterior materials create several repair needs at once.

Future Prospects: What to Expect

In the future, concrete removal pricing will likely become more detailed and transparent. More homeowners are asking for itemized quotes that show labour, hauling, disposal, equipment, and cleanup separately. This is a good thing because it helps people understand where the money goes. Disposal and recycling rules may also keep changing as cities try to reduce construction waste. According to waste management discussions across Canada, construction and demolition materials make up a large share of landfill waste, so better sorting will likely become more important. Homeowners should expect more questions about what type of concrete is being removed and what is mixed with it.

Technology may also help. Better saws, compact machines, and hauling tools can make tight-access jobs easier. Photos, video estimates, and digital measurements can help contractors give more accurate pricing before visiting the site. Still, no tool replaces a careful inspection. If your concrete is thick, reinforced, attached to the house, or hard to reach, an in-person review is still the best way to avoid surprises.

FAQ

One hidden cost of concrete removal is disposal pricing, since Calgary landfill loads are charged by weight and mixed materials can be billed at the highest applicable rate, which can quickly increase the final removal bill.

Q&A

Question

What hidden costs should Calgary homeowners expect before removing concrete?

Answer

Hidden costs include debris hauling fees, permit requirements, rebar disposal, site grading, and disposal surcharges for oversized loads.

Question

Are concrete removal permits required in Calgary and how much do they cost?

Answer

Most residential concrete removal in Calgary does not require a permit, but work near property lines, retaining walls, or utilities may trigger City of Calgary requirements.

What to Do Before You Book Concrete Removal

  • Ask for a written quote that includes labour, hauling, disposal, and cleanup.
  • Find out if reinforced concrete, rebar, or wire mesh will cost extra.
  • Check whether access issues could increase labour time.
  • Ask if grading, backfilling, or base prep is included after removal.
  • Confirm whether utility locates or City of Calgary requirements apply.
  • Keep concrete separate from soil, wood, and garbage when possible.

To learn more and view our other blogs, click here,

Conclusion

Concrete removal can seem simple, but the true cost depends on much more than breaking up a slab or step. Hauling, landfill rates, reinforced concrete, tight access, grading, and possible safety requirements can all change the final price. For homeowners planning concrete step removal Calgary projects, the best approach is to ask clear questions before work begins. A detailed quote can help you compare services fairly and avoid surprise charges later. It also helps you plan for what comes next, whether that is new steps, better drainage, or a cleaner yard. When you understand the hidden costs, you can make smarter choices and feel more confident from start to finish.

The photo used in this blog are for demonstration purposes only.
Spray Foam Certifications Importance

Understanding the Importance of Spray Foam Certifications and Proper Timing

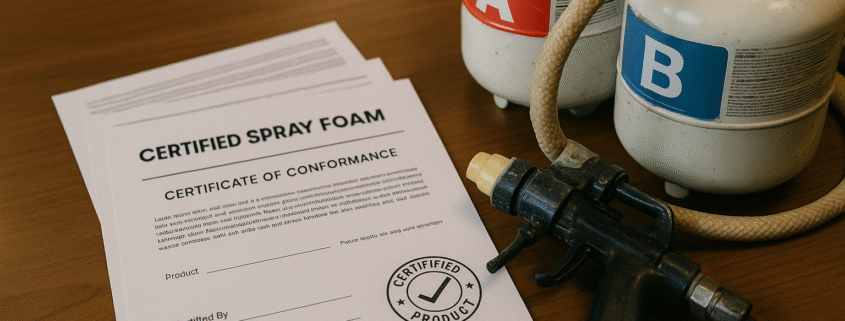
If you’ve been considering spray foam insulation for your property, timing is everything for performance and savings, but just as essential is using contractors who hold trusted spray foam certifications. Working with certified professionals like White Knight Contracting ensures your project meets industry standards for quality assurance foam and delivers safe products for your space.

Table of Contents

The History of Spray Foam and Certification Standards

Spray foam insulation has been around since the 1940s. Early insulation formulas were effective but not always safe, lacking any industry standards for safe products or consistent installation. In the 1970s and 1980s, as more homeowners sought energy savings, the industry developed foam certifications. These set minimum benchmarks for quality assurance foam, covering everything from how to apply the foam to what chemicals are allowed.

The biggest shift came with the emergence of third-party certification bodies, such as the Spray Polyurethane Foam Alliance (SPFA) and the Canadian Urethane Foam Contractors Association (CUFCA). These organizations implemented programs requiring hands-on training and written exams for contractors—raising the entire industry’s reputation and safety culture.

Right now, homeowners and builders expect more than basic insulation. Energy efficiency and air quality are priorities, which is why foam certifications have become a core requirement for choosing contractors. The industry is increasingly focused on products that perform well even in cold climates, ensuring proper timing of installation for maximum energy savings.

  • Stringent testing for chemical emissions and indoor safety
  • Programs requiring annual retraining on new installation methods
  • Digital credentialing—easy online verification of contractors’ credentials

Third-party certification is no longer optional for serious contractors; it’s a standard of doing business, just like carrying insurance. This trend shows how much consumers value quality assurance foam and proven safe products.

Common Challenges in Spray Foam Certification

Despite improvements, several issues remain in the world of foam certifications. Not all products on the market meet safety benchmarks, and some contractors cut corners on training to offer lower prices. This creates risks like improper curing, off-ratio application, or using expired chemicals—all of which could impact your home’s air quality and longevity.

Watch out for:

  • Unlicensed installers with no proof of industry standards
  • Lack of documentation for products or processes used
  • Unwillingness to provide test data or certifications

The short-term savings from hiring uncertified teams are rarely worth the risk when it comes to health and safety.

Future Prospects and Developments in Certification

Looking ahead, foam certifications will only get tougher. Environmental regulations are pushing for better chemicals with lower global warming potential and even stricter quality assurance foam requirements. Builders and homeowners want improved transparency—knowing exactly which safe products go into their walls and attics.

  • More advanced digital tracking of batch numbers and installation crews
  • Greater accountability through government and insurance audits
  • Wider adoption of “green” foam products that combine energy savings with environmental responsibility

For reputable companies, this is great news. It confirms that investing in proper certification and up-to-date training will always deliver better, safer results for clients.

What You Should Expect from Certified Contractors

When you choose a company with recognized spray foam certifications, you should expect:

  • Proof of industry-standard training and ongoing education
  • Clear safety protocols, including ventilation and clean-up
  • Detailed project plans with correct timing for insulation work
  • Full transparency about products and their safe use

A certified contractor will explain the difference between open-cell and closed-cell foam, assess your home’s needs, and document everything—from chemical batch numbers to quality assurance foam test results.

Comparing Certified vs. Non-Certified Applications

Real-world data shows homes insulated by certified technicians consistently outperform those done by uncertified teams:

  • Certified foam installs can reduce heating & cooling costs by up to 30%*
  • Fewer warranty calls or remedial repairs
  • Greater peace of mind thanks to safe products and cleaner indoor air

For example, a Calgary renovation used certified spray foam and met building codes for air leakage, while a competing project (uncertified install) failed blower tests and required expensive rework. Certification makes all the difference in long-term value.

*Source: NRCan Canada energy efficiency reports 2023

Interesting FAQ

Green Building Advisor instructs on integrating spray foam into green and energy-efficient home designs. Visit their resource here.

  • Why do foam certifications matter for my renovation timing? Only certified contractors can recommend the right season and conditions for installation, making sure your insulation cures and seals perfectly.
  • Are all foams created equal? No, quality assurance foam only comes from certified manufacturers and trained installers.
  • What is the risk of uncertified foam? Poor installation, unsafe chemicals, bad air quality, and lost energy savings.
  • Can I check a contractor’s certification? Yes—always ask for credentials and references before hiring.
  • Is spray foam safe for families and pets? Absolutely, when installed by professionals using safe products certified by third-party organizations.

Find Out More

To learn more and view our other blogs, click here.

How Concrete Steps Are Removed in Calgary Without Damaging Your Home's Foundation

Residential concrete removal Calgary projects often look simple from the outside, but removing steps beside a home takes planning, patience, and the right method. If the concrete is tied too closely to the house, one wrong hit can send vibration into the foundation or chip nearby surfaces. That is why homeowners often choose experienced crews like White Knight Contracting when old entry steps, cracked landings, or unsafe walkways need to come out safely. In Calgary, freeze-thaw cycles, shifting soil, and older construction styles can make concrete step demolition more delicate than expected. The goal is not just to break concrete apart. The goal is to remove it while keeping the home stable, clean, and ready for the next step.

Table of Contents

Why Residential Concrete Removal Calgary Needs Care

Concrete steps are heavy, hard, and often connected closely to the house. In some cases, they may sit against the foundation wall, rest on a footing, or be pinned with metal rebar. Rebar is steel reinforcement placed inside concrete to add strength. If a crew pulls too hard without checking for these connections, the force can damage nearby surfaces. This is why foundation safe removal is different from basic concrete breaking.

Calgary homes also deal with strong seasonal changes. Water gets into cracks, freezes, expands, and slowly pushes concrete apart. According to building science research, water expands by about 9% when it freezes, which helps explain why small cracks can turn into major step damage over time. When old residential concrete steps Calgary homeowners rely on become uneven, loose, or unsafe, removal may be safer than patching. However, the removal should be controlled from start to finish.

History of Residential Concrete Steps Calgary Homes Use

Many older Calgary homes were built with poured concrete steps because they were strong, affordable, and easy to shape on site. For decades, concrete was seen as the “set it and forget it” choice for front entries, basement walks, and side doors. In many neighbourhoods, these steps were poured directly beside the home with little room between the concrete and the foundation. At the time, this was common practice.

Today, contractors know more about drainage, soil movement, and foundation protection. A step that looked solid in the 1980s may now be cracked because water drained toward the house for years. In other cases, salt used during winter slowly weakens the surface. The history matters because older steps may hide metal pins, buried edges, or layers of past repairs. Before concrete step demolition begins, a careful crew checks how the steps were built and how they connect to the home.

How Foundation Safe Removal Works

Foundation safe removal starts with inspection. The crew looks for cracks, gaps, slope, drainage problems, and signs that the steps may be attached to the foundation. They may tap the concrete, check edges, and look for old patch lines. This helps them decide where to start and how much force is safe. The goal is to separate the step from the home before breaking the larger sections apart.

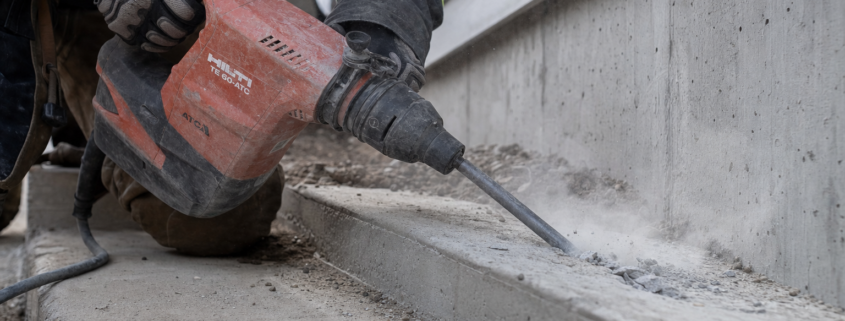
Next, the crew often uses controlled cuts. A saw cut creates a clean line where the concrete can break more predictably. Think of it like scoring a chocolate bar before snapping it. The cut helps guide the break and limits random cracking. After that, workers use smaller tools near the home and stronger tools farther away. The closer the crew gets to the foundation, the gentler the method should become.

Comparing Removal Methods

Not every concrete removal method is right for steps near a house. Heavy jackhammers can remove concrete quickly, but they create strong vibration. That may be fine for a detached slab far from the home, but it is risky next to a foundation. For residential concrete removal Calgary projects, the safest approach often combines several methods instead of relying on one tool.

  • Hand tools: Chisels, sledgehammers, and pry bars are slower but give better control near the foundation.
  • Rotary hammers: These tools chip concrete with less force than large breakers when used on lower settings.
  • Concrete saws: These create clean separation lines before the step is broken apart.
  • Mini equipment: Small machines may help move broken chunks, but they should not pull against the home.

A real-world example is a front step that has settled toward the house. If a crew starts by yanking the step forward with a machine, it could scrape the foundation wall or disturb the footing. A safer method is to cut the step into sections, remove outside pieces first, and hand-chip the concrete closest to the wall. This takes more time, but it lowers the chance of damage.

Modern concrete step demolition is moving toward cleaner, quieter, and more controlled work. Homeowners do not want clouds of dust near windows, gardens, or neighbours. Because of that, wet cutting is often used to reduce dust. Dust control matters because fine silica dust from concrete can be harmful when breathed in. Safety agencies in Canada and the United States both warn that silica exposure should be limited with water, masks, and proper work methods.

Another trend is selective demolition. This means removing only what needs to come out instead of smashing everything nearby. For example, a contractor may remove old steps while saving a good walkway or keeping part of a landing in place. This can reduce cost, waste, and repair time. It also supports better planning if the homeowner wants new precast steps, wood stairs, stone, or a fresh concrete pour after removal.

Common Challenges Near the Foundation

The biggest challenge is hidden attachment. Some steps are pinned into the foundation with steel rods. Others were poured tightly against the wall and have bonded over time. If the connection is not found early, the step may resist removal and transfer force into the house. This is one reason foundation safe removal should never feel rushed.

Drainage is another challenge. Once the steps are removed, the crew may discover soft soil, trapped water, or poor grading. Grading means the slope of the ground around the home. Good grading sends water away from the foundation. Bad grading sends water toward it. After residential concrete steps Calgary homes depend on are removed, homeowners should expect to review the area before installing the replacement.

Access can also be tricky. Tight side yards, fences, decks, and landscaping may limit tool choices. In those cases, crews may carry broken pieces by hand or use smaller carts. This may sound old-fashioned, but it protects the property. Sometimes slower work is the smarter choice.

Company Highlight

White Knight Contracting has been in business since 2011 and brings a practical advantage to homeowners who want fewer moving parts during a project. They can handle many related exterior needs, including siding, without requiring a second contractor. That matters because concrete removal near a home can sometimes expose trim, wall edges, or exterior finishes that need attention. Having one team that understands several parts of the home can make the process smoother.

Their strengths include careful planning, broad repair knowledge, and a focus on completing work with less stress for the homeowner. Instead of treating concrete as an isolated job, they look at how the steps, siding, grading, and entry area work together. For homeowners, this can mean fewer delays, clearer communication, and a better finished result. That full-home awareness is especially useful when the work is close to the foundation.

Future Prospects for Safer Concrete Removal

The future of residential concrete removal Calgary services will likely include better dust control, quieter tools, and more precise cutting. Battery-powered tools are improving and can reduce noise compared with some gas-powered equipment. Smaller demolition robots are also becoming more common in the construction world, though they are not needed for every home project. Over time, these tools may help crews remove concrete in tighter areas with less vibration.

Homeowners should also expect more focus on waste sorting. Concrete can often be hauled away and recycled as crushed aggregate, which may be reused in road base or construction fill. This keeps heavy material out of landfills and supports more responsible building practices. In the future, safe removal will not just mean protecting the foundation. It will also mean protecting air quality, nearby landscaping, and the environment.

FAQ

When concrete steps are close to the home, controlled cutting before removal can help reduce dust, vibration, and impact on surrounding structures, which is why careful planning matters when protecting the foundation.

Q&A

Question

How do pros remove concrete steps without cracking the foundation?

Answer

Pros use controlled demolition techniques, hand tools near the foundation, and careful extraction to avoid cracking or undermining the structural base.

Question

What tools do Calgary pros use to protect foundations during step removal?

Answer

Pros use hand chisels, rotary hammers on low settings, and manual pry bars within 12 inches of the foundation to avoid vibration damage to the footing.

What Homeowners Should Expect

Before work begins, expect the contractor to inspect the steps and explain the plan. You may be asked to clear furniture, planters, mats, or vehicles from the area. During removal, there will still be noise, but the key is controlled noise instead of careless impact. The crew should separate concrete in sections, manage debris, and protect nearby walls, doors, and windows. After removal, the area should be left ready for repair, grading, or replacement.

To learn more and view our other blogs, click here,

Conclusion

Removing concrete steps beside a home is not just about breaking and hauling away old material. It is about understanding how the steps were built, how close they are to the foundation, and how each tool affects the structure around them. With the right plan, concrete step demolition can be done safely, cleanly, and with far less risk to the home. For homeowners, the best results come from asking questions, choosing careful methods, and making sure the replacement area is prepared properly. Residential concrete removal Calgary work should always protect what matters most: the strength, safety, and long-term condition of the home.

The photo used in this blog are for demonstration purposes only.
Spray Foam Vapor Management Tips

Introduction

Humidity plays a huge role in spray foam vapor management, making it a top concern for homeowners and builders. At White Knight Contracting, our experience shows that effective vapor management, moisture barriers, and air flow control are all essential for keeping spaces dry, healthy, and energy-efficient, whether you’re building new or retrofitting older properties.

Table of Contents

The Evolution of Spray Foam Vapor Management

Spray foam insulation has changed dramatically since its introduction, especially in humid environments. In the early days, builders mainly focused on insulation’s ability to block heat transfer. Now, with better understanding of how water vapor travels through walls, vapor management has become a priority.

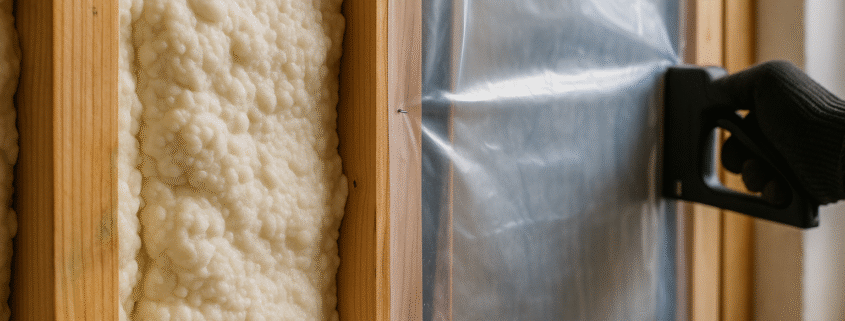
Vapor management means controlling how water vapor moves through walls, ceilings, and floors. Unmanaged vapor in humid places can lead to rot, mold, and wasted energy. Homeowners and professionals realized the need for more effective moisture barriers and air flow control, which brought spray foam into the spotlight.

Common Challenges in Vapor Management

Getting vapor management right can be tricky. Many homes, especially older ones, weren’t designed for tight envelopes or advanced insulation materials. As a result:

  • Improperly installed spray foam may trap moisture, leading to hidden mold or rot.
  • Poor air flow control causes condensation in wall cavities, especially during humidity swings
  • Lack of a proper moisture barrier can allow vapor to move through walls or roofs, reducing insulation’s effectiveness

Condensation is the biggest enemy of spray foam insulation. When warm indoor air meets a cold surface, the moisture in the air condenses and can soak insulation or wood framing. That’s why modern building codes stress the importance of continuous, sealed vapor barriers combined with intelligent airflow management.

New products and installation methods have improved how builders tackle vapor management, even under tough conditions like high humidity. Insulating foam now comes in both open-cell and closed-cell varieties, each with specific permeability ratings tailored for different climates.

Key trends include:

  • Hybrid wall assemblies that layer spray foam with other forms of insulation for added protection
  • Smart vapor retarders that adapt their permeability as seasons and humidity conditions change
  • More advanced air sealing techniques—such as taped seams and gasketed electrical boxes
  • Whole-house ventilation systems that actively balance indoor humidity

These methods help reduce condensation and increase the effectiveness of spray foam as a moisture barrier, making homes more comfortable and energy-efficient.

Condensation Reduction: Step-by-Step Solutions

If you’re facing humidity or condensation issues, the right spray foam vapor management steps can make a world of difference.

  1. Assess the local climate—Homes in wet, humid regions need more robust vapor barriers than those in dry areas.
  2. Select the right spray foam—Closed-cell foam has a lower vapor permeability and works well as a moisture barrier in high humidity conditions.
  3. Ensure continuous application—Spray foam should fully cover the cavity with no gaps, cracks, or voids.
  4. Seal penetrations—Every wire, pipe, or duct passing through the envelope should be sealed.
  5. Monitor indoor humidity—Use a hygrometer to check that humidity levels stay between 30–50%.
  6. Install mechanical ventilation—Balanced systems like ERVs or HRVs help control air flow and reduce indoor condensation risks.

Following these actionable steps helps prevent problems and extends the life of both your insulation and your home.

Future Prospects in Spray Foam Vapor Management

Spray foam insulation continues to evolve with science and technology. Experts predict that as climate conditions become more variable, there will be increased focus on smarter, adaptive solutions for vapor management.

Emerging innovations include:

  • Sensors embedded in walls to monitor temperature and moisture in real time
  • Eco-friendly spray foams made from renewable materials
  • Integration of AI-driven systems that automatically adjust humidity and air flow controls

As more homeowners and builders become aware of the importance of managing humidity and moisture, expect even stricter codes and smarter building designs focused on long-term health and energy efficiency.

Interesting FAQ

Insulation Institute provides insights into insulation material properties and energy code compliance.

  • What is the ideal indoor humidity for homes with spray foam insulation? Keeping humidity between 30 and 50 percent helps prevent moisture issues, mold, and damage to insulation.
  • Can I add siding or other upgrades after spray foam installation? Yes, with White Knight Contracting in business since 2011, you can manage multiple tasks like siding and insulation together with a single contractor, saving time and hassle.
  • Is open-cell or closed-cell spray foam better for vapor management? Closed-cell foams generally provide better moisture barriers and are recommended for areas with high humidity or risk of condensation.
  • How can I tell if I have an issue with vapor management? Signs include damp walls, musty smells, or visible condensation on cold surfaces—even inside.

Our Location

Conclusion

Spray foam vapor management requires attention to humidity, reliable moisture barriers, and smart air flow control. By using the latest condensation reduction strategies, you can ensure a comfortable, dry, and energy-efficient home. White Knight Contracting is ready to guide you through every step—no need to juggle multiple contractors for insulation or siding. To learn more and view our other blogs, click here.

High-pressure vs Low-pressure Foam

Introduction to High-Pressure vs Low-Pressure Foam for Modular Construction

Choosing between high pressure foam and low pressure foam can make a big difference when insulating modular homes and buildings. Whether you’re aiming for energy savings, noise reduction, or comfort, knowing the right application methods and foam types gives you better results. Many people in Alberta rely on White Knight Contracting for their spray foam insulation needs because of their expertise and reliable service.

Table of Contents

History of Modular Foam Insulation

Foam insulation for modular buildings took off in the 1970s, as efficiency standards grew stricter. Traditional batt insulation couldn’t meet the tight spaces and energy needs of modular builds in places like Alberta. Spray foam—especially high pressure foam—became a game-changer for its air sealing abilities. Over the decades, foam types and application methods have evolved, offering better R-values and addressing issues like moisture and air leaks.

Understanding Foam Types: High-Pressure and Low-Pressure

When people discuss high pressure foam and low pressure foam, they’re referring to how the foam is mixed and applied. Here’s the difference:

  • High-Pressure Foam: Mixed and sprayed at the jobsite using specialized equipment, creating a fast-reacting, dense foam. This is often used for large-scale or open-area applications.
  • Low-Pressure Foam: Comes in portable kits or cartridges, mixed as it’s dispensed. It reacts slower, making it better for smaller jobs, touch-ups, or repairs.

Both foam types are closed-cell or open-cell, which impacts insulation value and flexibility. Closed-cell foam is moisture-resistant and denser, while open-cell is lighter and more flexible, but both contribute to energy efficiency in modular construction.

Application Methods for Different Foams

Your choice of application methods affects how insulation performs in modular builds. High pressure foam is installed using large rig-mounted spray systems. This allows for quicker coverage, especially in new construction, warehouses, or big modular homes. Tight air sealing in a single pass makes it popular.

Low pressure foam, on the other hand, uses handheld applicators. Contractors prefer these for patching, tricky corners, or repairs—where fine control is needed. In both cases, application must be done at the right temperature and thickness to ensure foam types perform as expected.

Comparison: High-Pressure vs Low-Pressure Foam

Comparing high pressure foam to low pressure foam for modular projects boils down to several factors:

  • Speed: High pressure foam covers big areas fast; low pressure is slower but more precise for small spaces.
  • Cost: High-pressure systems are more expensive to set up, but efficient for bigger jobs. Low-pressure kits are budget-friendly for spot applications.
  • R-Value: High-pressure closed-cell foam offers a higher R-value per inch, meaning better insulation in less space.
  • Safety: Both require safety gear, but high-pressure foams need experienced operators due to chemicals and pressure involved.
  • Cleanup: Low pressure foam usually means less mess and easier cleanup, ideal for occupied or finished modular homes.

A real-world example: a commercial modular office in Calgary used high pressure foam for the main structure, and low pressure foam to seal gaps after windows were installed—maximizing both coverage and comfort.

Today, modular construction is driving a demand for eco-friendly and efficient building materials. Foam types that are lower in VOCs and have renewable components are trending. Some application methods now use smarter rigs with temperature sensors for high pressure foam. Data shows spray foam insulation can deliver up to 50% better energy performance over fiberglass in certain climates. Homeowners and builders in Alberta are choosing modular and sustainable solutions more than ever, with focus on airtightness, quick build times, and long-term savings.

Challenges in Choosing the Right Foam for Modular Builds

The biggest challenge is matching the right foam types and application methods to the project’s needs. Not all modular modules are the same—tiny homes have different air leak concerns than classroom pods. Some issues include:

  • Ensuring correct chemical ratios in high pressure foam for proper expansion
  • Choosing open-cell or closed-cell foam for moisture control
  • Managing project costs with supply chain changes
  • Training crew for safe, proper application in small or confined spaces

Careful planning and professional installation make all the difference.

Future Prospects of Foam Insulation in Modular Construction

Foam insulation in modular homes and structures is expected to become smarter and greener. High pressure foam will likely be engineered to cure faster with even fewer emissions, while low pressure foam delivery systems could become more user-friendly. Alberta is seeing more incentives for energy-efficient building, including modular homes with advanced foam types and application methods. Industry experts agree the next step is integrating sensors and smart tech into foam installations for even better quality control and comfort.

Interesting FAQ

Icynene details the formulation, application, and long-term advantages of spray foam insulation.

  • What’s the difference between open-cell and closed-cell foam? Open-cell is softer and allows some air flow, making it better for soundproofing. Closed-cell is rigid, moisture-resistant, and has a better R-value.
  • How long does spray foam insulation last in modular homes? High quality spray foam can last 20–30 years or longer with proper installation.
  • Is high pressure foam safer than low pressure foam? Both are safe when correctly applied, but always require protection. High pressure jobs should be handled by trained pros.
  • Can spray foam be added to older modular homes? Yes, with careful prep, both foam types can upgrade older structures’ insulation and comfort.
  • How do I know which foam type to choose? Consider your budget, the building use, and whether you need air sealing or moisture resistance. A contractor can help guide your decision.

Company Highlight

In business since 2011, White Knight Contracting is your trusted expert for spray foam insulation in modular, mobile, and traditional buildings. With experience across siding and more, there’s no need for extra contractors—you get high-quality results from a single team.

Find Us on the Map

Conclusion

Before and after concrete removal projects show how much old slabs can affect a home’s safety, style, and everyday use. A cracked driveway, uneven walkway, or broken patio may seem like a small issue at first, but over time it can become harder to ignore. Removing damaged concrete gives homeowners a fresh start and helps create outdoor spaces that work better. In Calgary, where winter weather can be tough on concrete, knowing when to remove instead of repair is important. With the right planning, a worn-out area can become clean, safe, and ready for something new. These five transformations are a clear reminder that sometimes the best improvement begins by taking something away.

The photo used in this blog are for demonstration purposes only.
Best Season For Spray Foam

Introduction

The chemistry behind spray foam installation directly influences its effectiveness, so knowing the best season for spray foam can save homeowners money and maximize comfort. Whether you’re sealing a new build or upgrading an older property, weather friendly foam and proper insulation season timing are crucial parts of a successful project. White Knight Contracting has been helping clients since 2011 to make smart choices in the ever-changing climates of Western Canada.

Table of Contents

A Quick History of Spray Foam Chemistry

Spray foam insulation, once found mostly in factories and refrigerators, has become a mainstream home product. The core chemistry relies on combining isocyanates with polyols—two molecular families that react quickly when sprayed. Once mixed, the chemicals expand rapidly, forming a rigid, air-tight barrier. This foam traps air, reducing energy loss and creating an even temperature across your home.

Initially, early versions in the 1960s and 70s sometimes struggled with moisture or improper expansion. Modern formulas have evolved, allowing installation season flexibility and stronger weather friendly foam performance. Today, pro installers can offer effective insulation nearly year-round, provided certain conditions are met.

Why the Installation Season Matters for Spray Foam

Timing can make or break your spray foam insulation project. Unlike batts or loose-fill, foam must be installed under the right temperature and humidity. Summer and fall are often considered the best season for spray foam because the chemical reaction thrives in warmth—typically between 15°C and 30°C (59°F to 86°F).

  • In cold weather, foam may not expand correctly or cure properly, reducing its R-value (insulation power).
  • Too much moisture in spring can impact the bond between foam and your wall, attic, or floor.
  • Professional installers monitor both air and surface temperature to ensure quality results.

Timing your installation can also speed up construction projects and save on utility bills—helping you stay cozy in winter and cool during summer.

Weather Friendly Foam: Chemistry Meets Climate

The chemical reaction that transforms liquid into foam is temperature-sensitive. When the weather drops below 5°C (41°F), the components may become thick or sluggish, while excessive humidity above 60% can lead to poor adhesion and demolding. This is why pro installers typically recommend late spring, summer, or early fall as the best season for spray foam insulation.

  • Warm, dry days allow the chemistry to work quickly and evenly.
  • Some special cold-weather formulas now exist, offering more flexibility year-round.
  • Ventilation remains crucial—open windows or use fans to help the foam cure, regardless of season.

For Calgary homeowners looking for weather friendly foam solutions, modern spray foam chemistry means jobs can proceed nearly any time, with proper prep and product selection.

Best Time Insulation: Seasonal Tips for Every Homeowner

When should you schedule your spray foam project? Here’s an easy guide for the best time insulation based on common seasonal conditions:

  • Spring: Wait until consistent daytime highs above 10°C (50°F) and humidity drops below 60% for best results.
  • Summer: Ideal temperatures mean fast curing and strong expansion. Work early or late to avoid peak afternoon heat.
  • Fall: Early autumn works well, especially before overnight frost. Monitor forecasts to prevent sudden drops in temperature.
  • Winter: Only attempt with cold weather foam and heated workspaces. More challenging and may require more prep.

Smart homeowners compare forecasts with their installer and discuss any concerns about changing weather. For best time insulation, flexibility and a knowledgeable contractor make a big difference.

Challenges & New Trends in Spray Foam Application

Spray foam is changing fast. New chemistry and equipment allow more precise installation every year, but seasonal challenges still exist.

  • Climate change is bringing less predictable weather, which requires careful monitoring before and during installation.
  • New “quick-cure” or low-temp foams are arriving on the market, offering solutions for tricky installation season challenges.
  • Rising energy costs make choosing the best season for spray foam even more important to maximize your investment.
  • Professional crews, like those at White Knight Contracting, can adjust plans and products for homes that need more than just insulation—such as siding, decks, or energy retrofits.

Recent industry data shows homes using spray foam properly installed in-season can achieve up to 30% energy savings compared to those insulated with other materials at the wrong time.

Looking Ahead: Future Prospects for Spray Foam Seasons

The future of insulation season timing looks bright as science improves spray foam recipes and installation methods. Nanotechnology and renewable raw materials may someday create all-weather foams that bond no matter what Mother Nature throws at us.

  • Expect to see more eco-friendly foams made with bio-based side chains and lower emissions.
  • New sensors and smart sprayers help crews ensure the chemistry is perfect, rain or shine.
  • Regulations are likely to push for higher building efficiency, making best time insulation knowledge even more valuable for homeowners.

With these advances, even Western Canada’s unpredictable climate won’t stand in the way of a weather friendly foam installation.

Interesting FAQ

Assembly Magazine compares characteristics of open and closed-cell spray foam for various uses.

  • Q: What happens if spray foam is applied outside the recommended temperature range?
    A: The foam may fail to expand fully or cure unevenly. This can lower its effectiveness and create gaps or weak spots in the insulation.
  • Q: Can spray foam be installed during winter?
    A: Yes, but only with special cold-weather formulations and professional equipment. Extra prep steps and workspace heating may be needed.
  • Q: How long does it take for spray foam to cure?
    A: Typically, foam cures in just a few hours with optimal temperature and humidity. Colder or wetter conditions may extend this to a full day.
  • Q: How does the chemistry of spray foam make it different from fiberglass or cellulose?
    A: Spray foam forms a continuous, air-sealed barrier by expanding into every gap. Its chemistry creates a superior vapor and air barrier compared to traditional batts or loose-fill.
  • Q: Why choose White Knight Contracting?
    A: With experience since 2011, we offer comprehensive home upgrades—foams, siding, and more—without having to hire multiple contractors.

To learn more and view our other blogs, click here.


Humidity Challenges Spray Foam Solutions

Introduction

Finding a waterproof solution for your home or commercial building is essential in cities where unpredictable weather leads to seasonal humidity challenges and moisture issues. Spray foam insulation has become one of the preferred ways to tackle problems like humidity control foam, dampness prevention, and moisture resistance all at once. At White Knight Contracting, experts in insulation since 2011, there’s a strong focus on multi-service solutions so you don’t need several contractors for one job.

Table of Contents

History of Humidity Challenges in Insulation

Insulation has been used for decades to manage indoor temperatures but, historically, controlling humidity was a challenge. In older homes, materials like fiberglass or cellulose were common but often struggled with dampness prevention, trapping moisture, and encouraging mold growth. These traditional barrier methods lacked true waterproof qualities, causing headaches for homeowners during extreme seasonal humidity challenges. Builders soon realized that basic materials couldn’t always keep up with shifting Canadian weather, which can swing from dry to very damp within weeks.

It became clear that there was a need for insulation materials that did more than block heat—they needed moisture resistance and the ability to form airtight seals. The move toward closed-cell spray foam marked a major turning point, offering advantages not just for warmth, but for humidity control foam performance as well.

Today, new homes and renovations put a high value on using waterproof solutions, especially where moisture-prone basements, crawl spaces, and attics are concerned. Spray foam stands out by expanding into cracks and sealing every small gap—making it an effective choice for both insulation and moisture resistance.

  • Closed-cell spray foam is up to 90% more moisture-resistant than many traditional insulation types (according to industry studies).
  • Humidity control foam helps stabilize indoor air by sealing out outdoor seasonal humidity changes, keeping your home drier year-round.
  • Property owners benefit from lower energy bills, fewer mold issues, and improved comfort during all seasons.

Beyond performance, spray foam is also a greener option. It often contains recycled content, and its durability cuts down on the need for frequent replacements, reducing both waste and long-term costs.

Common Challenges & Solutions for Seasonal Humidity

Some of the most pressing humidity challenges come during the transition between seasons—spring snowmelts, fall rains, and muggy summer spells. These times can bring unexpected dampness and moisture problems inside homes. When insulation fails here, it can lead to:

  • Mold growth beneath walls and floors
  • Wood rot and foundation issues
  • Unpleasant odours and indoor air quality problems

Spray foam solutions outperform many alternatives by blocking moisture migration and condensation in all weather conditions. However, the installation must be done correctly. It’s crucial to choose seasoned professionals who understand how to adapt the technique depending on surface material, outdoor conditions, and building age.

For Canadian homeowners facing harsh seasonal humidity challenges, a combination of waterproof spray foam and smart design mitigates risk and extends the lifespan of structures.

Future Prospects: Where Are We Headed With Waterproof Spray Foam?

With climate patterns shifting and severe weather events occurring more frequently, the push for reliable dampness prevention continues. We are seeing:

  • Advances in spray foam formulas that increase moisture resistance and air-tightness
  • Improved application tools for tighter, neater seals in hard-to-reach spaces
  • A growing demand for pro installers capable of delivering durable waterproof results

Industry reports predict that spray foam’s popularity for humidity control foam will grow by nearly 7% each year in North America over the next decade. This is partly due to building codes raising standards for energy efficiency and water-resistance in new construction and renovations.

What to Expect: Step-By-Step Guide for Spray Foam Waterproofing

If you’re considering spray foam to conquer your humidity and waterproofing challenges, here’s what you can expect from the process:

  1. Assessment: A trained contractor will inspect susceptible areas for existing moisture, air leaks, and signs of mold.
  2. Preparation: Surfaces are cleaned and prepped. This may include temporary removal of wallboard or floor panels.
  3. Application: Spray foam is applied as a liquid, quickly expanding into an airtight and waterproof barrier.
  4. Curing: Foam hardens in a matter of hours, locking out water vapor and air movement.
  5. Reassembly: Finishing panels are reinstalled, and all surfaces are sealed.

Expect clear explanations about the types of spray foam chosen for your unique situation, focusing on improved dampness prevention and year-round moisture resistance.

Interesting FAQ

  • Natural Resources Canada offers guidelines for selecting insulation to optimize home energy performance.
  • Why choose humidity control foam over traditional insulation? Spray foam insulation offers better moisture resistance, longer durability, and improved air sealing properties compared to materials like fiberglass.
  • Can waterproof spray foam help prevent mold and water damage? Yes, when properly installed, it provides a strong barrier against water vapour and condensation, greatly reducing the risk of mold growth.
  • Are there spray foam options for older homes? Absolutely! Modern spray foam can be tailored to both new construction and retrofit projects, making it suitable for basements, attics, and wall cavities in older houses.
  • How does White Knight Contracting stand out? In business since 2011, White Knight Contracting handles all steps, from assessment to installation. Their team can even handle exterior siding or repairs so you won’t need to hire a second contractor for related work.

Find Us Here

Conclusion

Tackling seasonal humidity challenges and keeping your home dry starts with a smart, waterproof spray foam solution. The right humidity control foam not only saves money on repairs and energy but also ensures a healthier indoor environment. Whether you’re building new or updating old spaces, moisture resistance and dampness prevention should never be overlooked. For expert help and all-in-one solutions, trust a team that handles every step of the process—and more. To learn more and view our other blogs, click here.

Modular Homes Insulated With Foam

Introduction

Condensation can be a persistent challenge in modular homes, but with the use of modern foam insulation techniques, both moisture issues and energy costs can be effectively controlled. White Knight Contracting has been providing specialized solutions since 2011, delivering expert services for modular home foam insulation and more. Addressing condensation is crucial for healthy living spaces and maintaining the value of prefab and mobile homes.

Table of Contents

History and Evolution of Modular Home Foam Insulation

Modular homes, also known as prefab or mobile homes, have gained popularity since the mid-20th century due to their affordability and speed of construction. In earlier decades, traditional fiberglass batts were common. However, as concerns about energy efficiency and condensation grew, builders turned to more advanced options like foam insulation. Foam panels and spray foam started replacing outdated materials to prevent air leaks and moisture buildup, which are major contributors to condensation inside living spaces. The shift to foam-based insulation dramatically improved indoor comfort and decreased utility costs for homeowners.

Today, modular home foam insulation is on the rise, thanks to its ability to conform to unique shapes and tight spaces. Prefab insulation materials, including closed-cell spray foam, create a seamless barrier against drafts and dampness. They’re especially suited for offsite construction foam applications, where precision and quick installation are needed. Recent studies show that homes insulated with foam can experience up to 30% lower energy bills compared to those with older methods. Another hot trend is “hybrid insulation,” combining foam with eco-friendly products to increase both environmental impact and home efficiency.

Common Challenges: Moisture & Condensation Management

One of the top obstacles in mobile home energy efficiency is the ongoing battle with condensation. When warm, humid air meets colder surfaces—like walls or ceilings without proper insulation—condensation forms. Over time, this can lead to mold, rot, and unhealthy indoor air. Modular home foam provides a tightly sealed barrier, keeping moisture out and maintaining stable temperatures. However, installing it incorrectly or using the wrong foam type can trap unwanted dampness. Proper ventilation and expert installation are necessary to ensure success with offsite construction foam products.

Comparing Insulation Methods for Modular and Mobile Homes

Not all insulation is created equal. Below is a quick comparison of popular options used in modular homes:

  • Fiberglass Batts: Cheap, but leaves gaps where air and condensation sneak in.
  • Blown-in Cellulose: Better at filling odd spaces, but may settle over time, reducing effectiveness.
  • Rigid Foam Board: Offers solid thermal performance, but installation can be tricky in complex wall shapes.
  • Spray Foam Insulation: Expands on contact, sealing every nook — excellent for prefab insulation, especially in offsite construction foam projects.

Spray foam insulation stands out for mobile home energy savings because it combats condensation by making a tight, moisture-resistant envelope. It can be used in walls, floors, and even attics for maximum impact.

Innovation and the Future of Offsite Construction Foam

The future for modular home foam is looking bright. Advancements in insulation are making prefab builds more green and efficient. New closed-cell foams are engineered to be even more vapor-resistant, helping owners avoid costly condensation problems. Higher R-values mean better resistance to heat flow – translating to smaller energy bills and less stress on heating/cooling systems. Industry experts predict that smart insulation products—featuring sensors or self-healing properties—could soon be standard in modular homes. As more people seek affordable, high-performance living, offsite construction foam technologies will continue to lead the way.

Step-by-Step Guide: Upgrading Your Mobile Home Energy Efficiency

  • Schedule a home assessment to check for air leaks, drafts, and areas of moisture or condensation.
  • Partner with insulation professionals familiar with offsite construction foam, like spray foam or rigid foam products.
  • Seal all wall, ceiling, and floor cavities thoroughly—don’t skip crawl spaces or attics.
  • Install vapor barriers where necessary to further protect against moisture buildup.
  • Consider upgrading windows and doors, as insulation works best when paired with energy-efficient glazing.
  • Check that ventilation systems are adjusted to balance airtightness and fresh air, reducing risks of trapped condensation.
  • After installation, monitor your home for signs of improved comfort and lower mobile home energy bills.

With the right modular home foam system, homeowners notice warmer winters, cooler summers, and far fewer condensation headaches.

Interesting FAQ

Energy.gov showcases the efficiency of spray foam in cutting heating and cooling energy use.

  • What is the main cause of condensation in modular homes?
    Condensation occurs when moist interior air touches cooler surfaces that aren’t properly insulated, forming water droplets that can cause damage if left unchecked.
  • Is modular home foam safe and eco-friendly?
    Yes, today’s prefab insulation foams are manufactured with high safety standards. Some varieties are made with low-VOC formulas and recyclable materials.
  • Can existing mobile homes upgrade to offsite construction foam insulation?
    Absolutely. Professional installers can retrofit most mobile or modular homes by applying spray foam or rigid boards to improve energy efficiency and comfort quickly.
  • Does insulation solve all energy problems in mobile homes?
    While modular home foam dramatically boosts comfort and lowers bills, pairing it with sealed ductwork, efficient windows, and proper ventilation creates the best outcome.

Contact and Learn More

White Knight Contracting’s expertise goes beyond insulation—they also handle siding and a variety of home upgrades, so you won’t need to hire multiple contractors. Whether you’re tackling condensation issues or planning a full prefab insulation upgrade, experienced help is just a click away. To learn more and view our other blogs, click here.

Chemistry Behind Spray Foam Process

Introduction

The weather can have a significant impact on the chemistry behind the spray foam process, affecting everything from chemical reactions to foam composition. At White Knight Contracting, a company known for quality spray foam installations since 2011, understanding the science behind spray foam, especially in different weather conditions, makes all the difference for homeowners and builders alike.

Table of Contents

A Brief History of Spray Foam Chemistry

Spray foam insulation has roots going back to the 1940s, when early forms of polymer-based foams were first created. Over time, advancements in polymer science foam allowed scientists to improve both the safety and effectiveness of spray foam used in homes and buildings. Historically, the main breakthrough was in controlling the foam composition to create products compatible with different climates and construction techniques. Today’s foam chemistry now delivers energy savings, improved indoor comfort, and long-term durability — benefits that keep growing as our understanding of chemical reaction insulation deepens.

How Weather Influences the Spray Foam Process

Weather conditions play a crucial role in both the application and performance of spray foam. For instance, temperature and humidity directly impact the chemical reactions that transform the liquid components into solid foam. If it’s too cold, the chemical reaction may slow down, causing the foam to cure improperly. High humidity can increase moisture in the foam composition, leading to potential long-term issues like reduced insulation value or even trapped condensation. Professionals need to watch weather forecasts closely and may adjust techniques or solutions day-by-day for optimal results.

Foam Chemistry and Polymer Science Explained

The core of spray foam’s effectiveness lies in the interplay between isocyanates and polyols. When these two chemicals mix, they react and expand to form a rigid foam. Polymer science foam comes into play here, as the mix needs the right ratio and temperature to create durable cell structures. The precise chemical reaction insulation creates millions of airtight bubbles, which block both heat and moisture transfer. To ensure quality, technicians must precisely control how and when they mix the chemicals, especially when weather conditions change rapidly.

Chemical Reactions in Insulation Systems

The magic of spray foam comes from its chemical reaction insulation process. As isocyanates and polyols blend, they begin a rapid exothermic (heat-producing) reaction. This produces carbon dioxide, which causes the mixture to expand. Understanding foam composition here is critical, as adding too much water or applying in poor weather can destabilize the foam, weakening its structure. Think of it like baking a cake: even with the right ingredients, incorrect oven temperature—just like bad weather—can ruin the results.

Current Challenges and Common Issues

Weather remains the most unpredictable variable for the spray foam process. Freezing temperatures, for example, slow down chemical reactions, and improper drying times may change the foam’s density or adhesion. Excess moisture can react with chemical components, sometimes causing shrinking or cracking. Besides weather, the foam chemistry itself continues to evolve, balancing eco-friendliness with performance. Ongoing research in polymer science foam helps produce formulas that stand up better to harsh climates, but careful application remains essential.

Trends and Future Prospects in Foam Chemistry

The future of foam chemistry is looking bright. Researchers now experiment with bio-based materials and enhanced chemical formulations for greener products. Smart additives in the foam composition can deliver improved fire resistance or mold prevention. As climate conditions change, companies like White Knight Contracting keep adjusting both their materials and methods, ensuring spray foam remains reliable no matter the season. Innovations in foam chemistry will also help homeowners achieve energy savings and indoor comfort, even during unpredictable spells of weather.

Why Choose White Knight Contracting?

With a decade-plus of experience, White Knight Contracting stands apart because of its deep technical knowledge about both foam chemistry and real-world construction challenges. If your home project requires more than just insulation, the company can handle many related improvements — including siding — without the hassle of bringing in another contractor. This means peace of mind, a single point of contact, and a job done right the first time, regardless of the weather outside.

Interesting FAQ

  • Building Science Corporation discusses condensation control and durability challenges in spray foam applications.
  • How does the weather affect spray foam insulation?
    The weather impacts curing time and chemical reactions; cold or humid days can slow or disrupt the foam’s ability to form an airtight seal.
  • What is the science behind spray foam chemistry?
    It’s a fast chemical reaction between isocyanates and polyols, controlled by polymer science, which forms the foam’s insulating structure.
  • Can spray foam be applied in the winter?
    Yes, but with stricter controls on temperature and humidity, plus adjustments to the foam composition to ensure a proper cure.
  • Is foam chemistry changing to become more environmentally friendly?
    Absolutely, with trends leaning towards more sustainable and safer chemical components in modern foam formulations.

To learn more and view our other blogs, click here.